

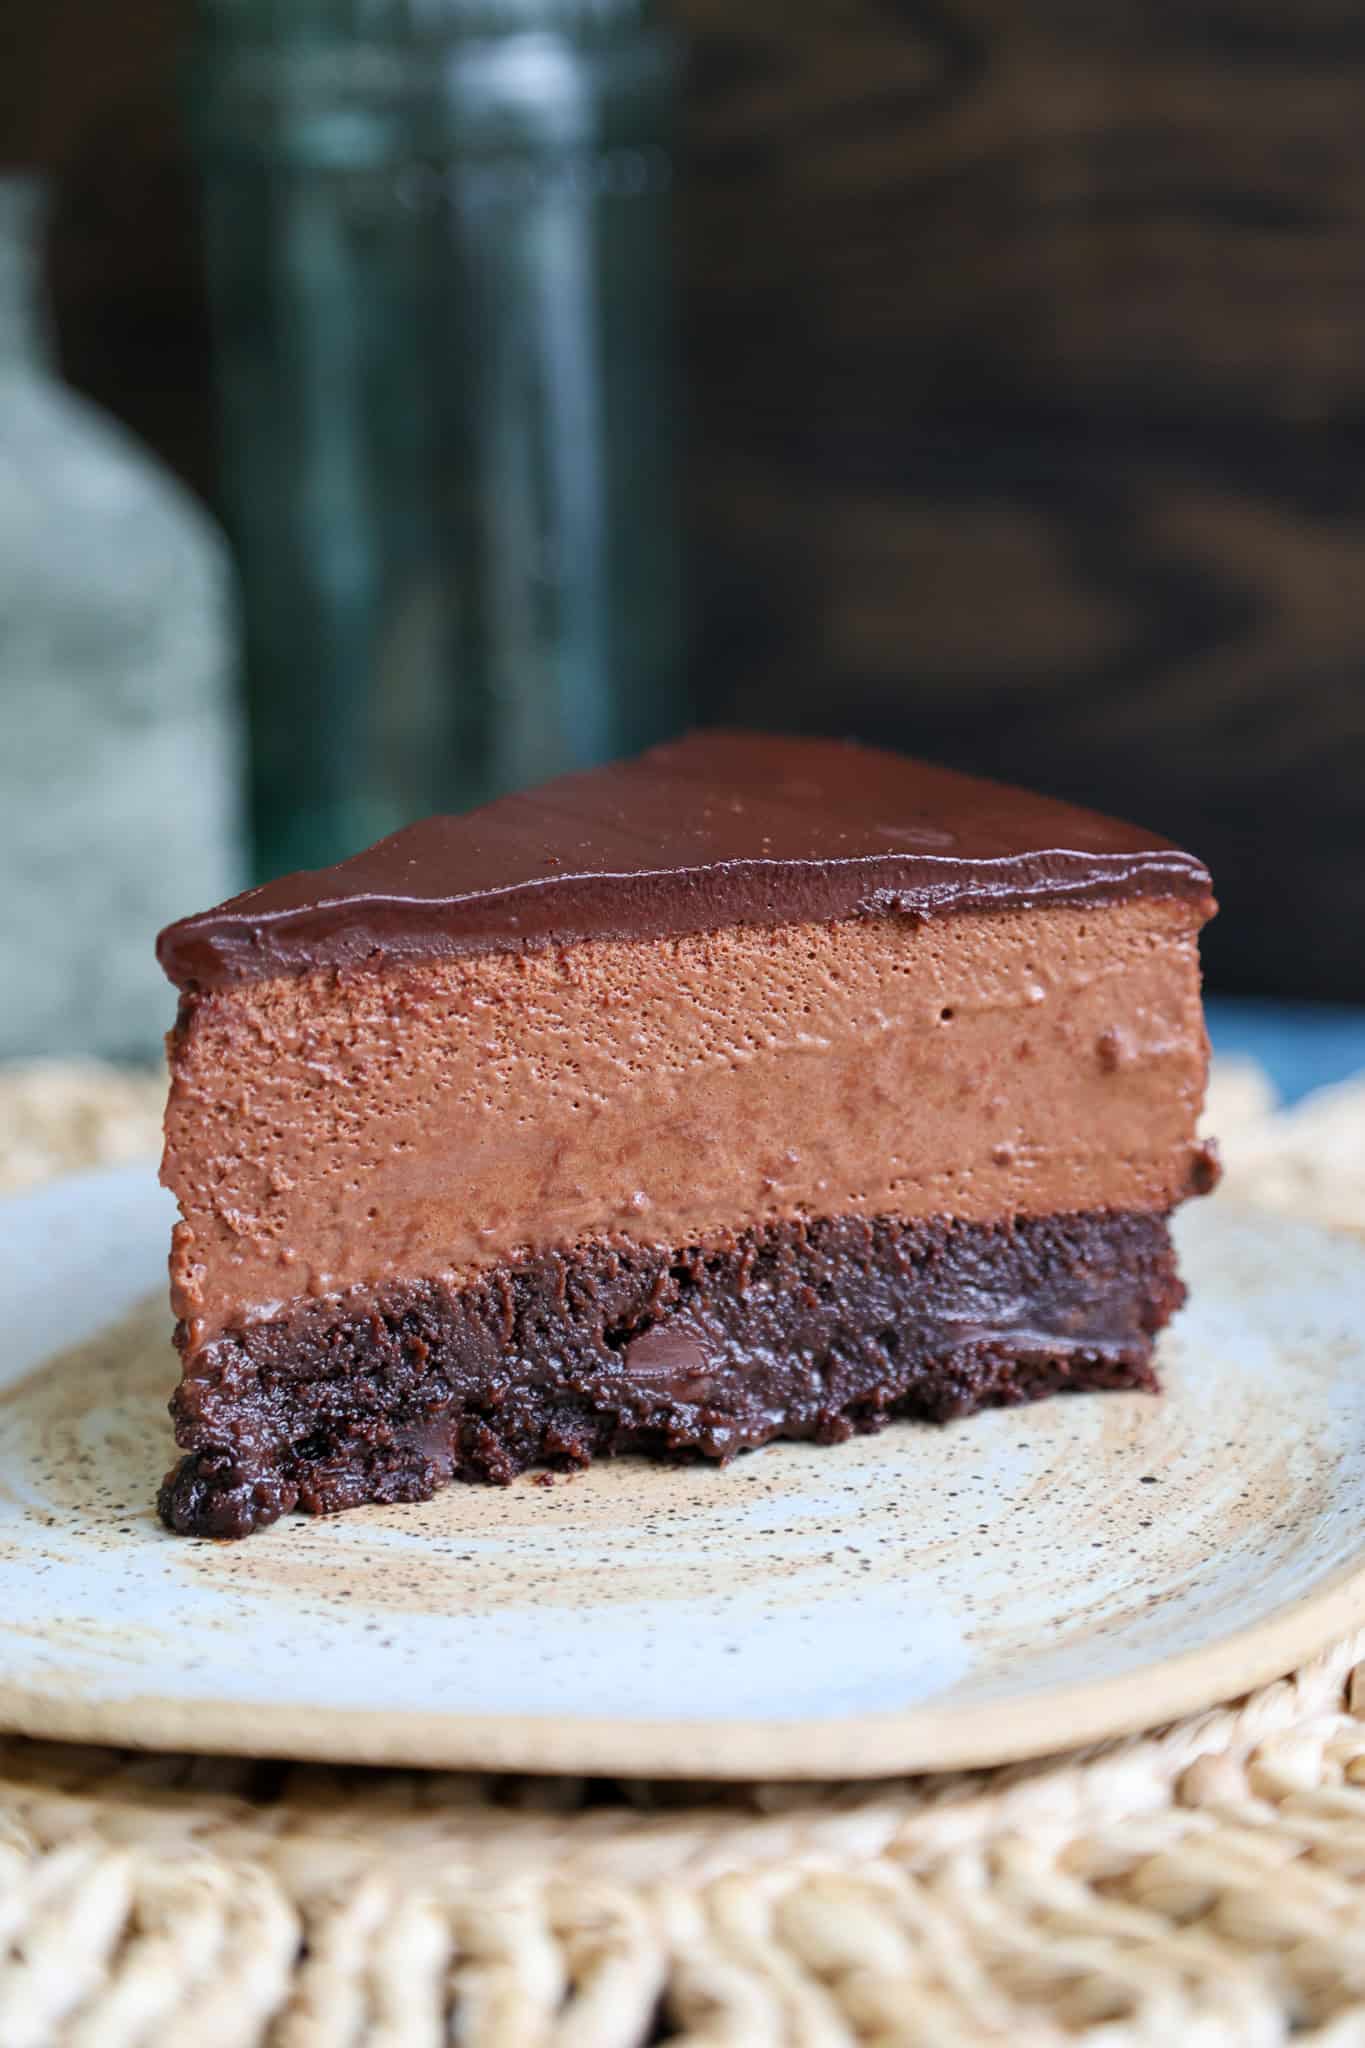
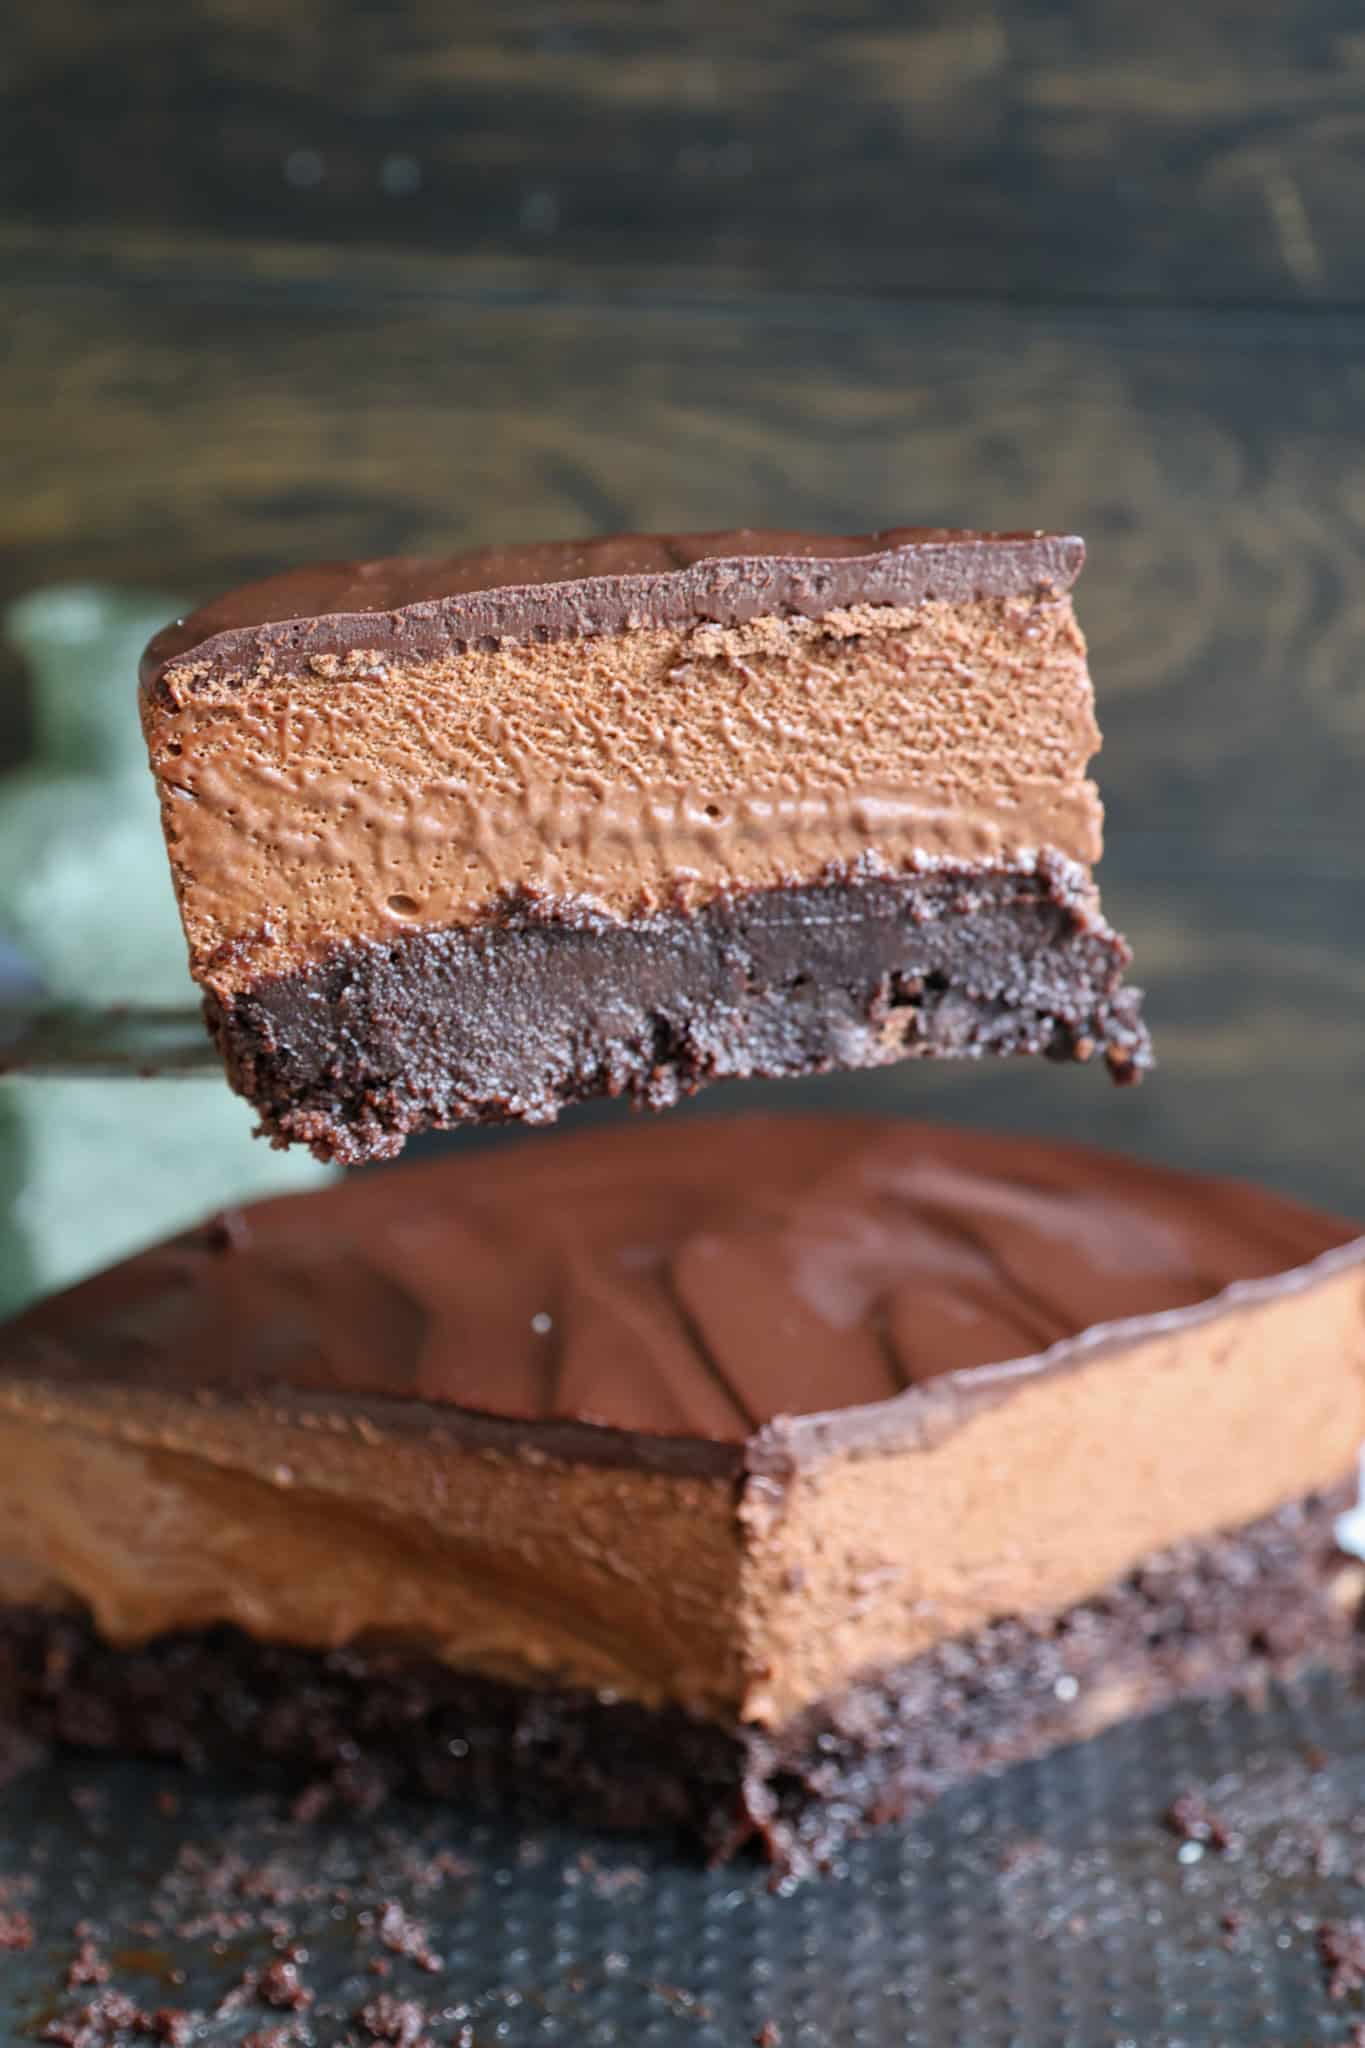
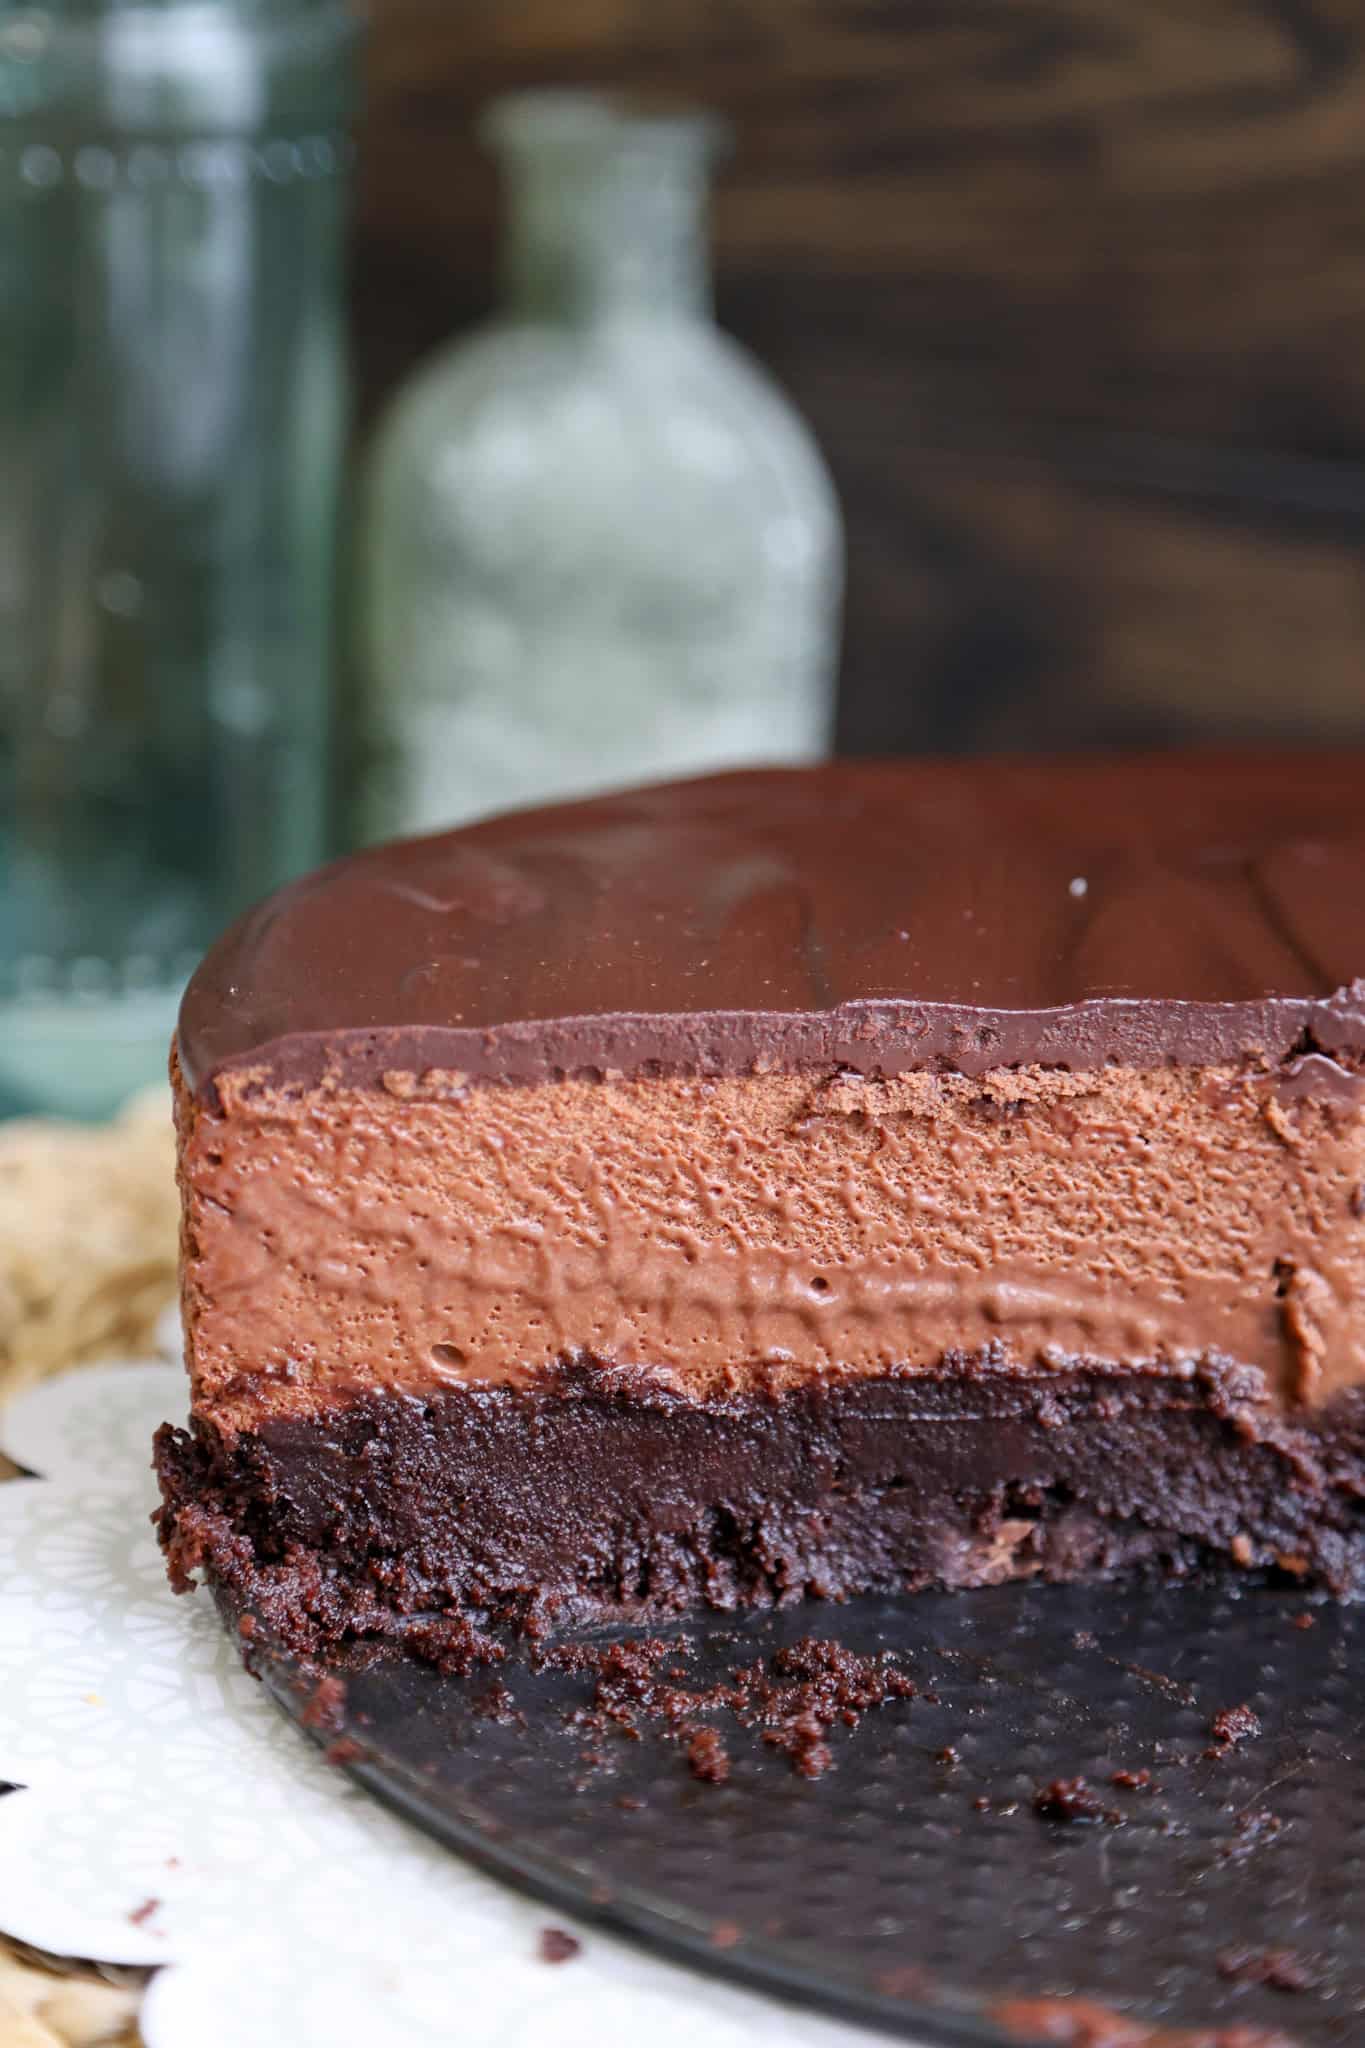
This chocolate mousse cake with a fudgy brownie base has been my go-to showstopper dessert for years, and it never fails to impress at every dinner party, birthday celebration, and holiday gathering. I've perfected this recipe over time, tweaking the ratios until I achieved the ideal balance between the dense, rich brownie layer and the silky, airy chocolate mousse on top.
What I love most about this dessert is how it delivers double the chocolate experience while maintaining an elegant lightness – the contrast between textures is absolutely irresistible. After making this countless times, I can confidently say it's one of those recipes that looks incredibly fancy but is surprisingly straightforward to make.
Whether you're celebrating a special occasion or simply indulging your chocolate cravings, this make-ahead dessert will become your new favorite way to end a meal in the most decadent way possible.
Why you'll love this chocolate mousse cake
- The dense, fudgy brownie base paired with airy chocolate mousse creates an irresistible texture contrast that makes every bite exciting.
- It delivers double the chocolate intensity, satisfying serious chocolate cravings while balancing richness with lightness.
- This dessert looks impressively elegant and bakery-worthy, yet it's surprisingly easy to make at home.
- It's a perfect make-ahead dessert that actually improves as it chills, taking all the stress out of entertaining.
- The combination appeals to everyone – cake lovers get their fudgy brownie fix while mousse fans enjoy the silky, creamy topping.
- It works beautifully for any celebration, from birthdays and holidays to romantic dinners and dinner parties.
Main ingredients needed for this indulgent brownie mousse cake
1. Chocolate (Semi-Sweet, Milk AND Dark) The star ingredient that provides the rich, intense flavor and creates the mousse's signature velvety texture when melted and combined with other ingredients.
2. Heavy Whipping Cream Creates the light, airy texture of the mousse when whipped, while also adding richness and a silky mouthfeel that makes the dessert luxurious.
3. Gelatin Acts as a stabilizer that helps the mousse hold its shape and structure when set, ensuring clean slices and preventing the mousse from collapsing or becoming runny.
4. Sugar Balances the bitterness of dark chocolate and sweetens the mousse to the perfect level.
5. Eggs Provide richness and help create a creamy, smooth base for the mousse; essential for the brownie layer to achieve that dense, fudgy texture and bind all ingredients together.
How to make this mousse cake
Firs we're going to make the brownie cake layer. Traditional chocolate mousse cake has a chocolate cake layer as the base, but I opted for a richer brownie base instead.
First we make the brownie base
- For this we use a 10 inch springform cheesecake pan
- Melt 10 tablespoons salted butter in the microwave in a micrwoave-safe bowl in 20-second increments until fully melted. Pour into a large mixing bowl. Whisk in granulated sugar by hand until smooth, 30 seconds.
- Add in the eggs, vanilla extract and coffee liqueur. Whisk vigorously for 1 minute to ensure a crackly top.
- Melt chocolate chips in a microwave in 30-second increments, stirring between each. Once melted and smooth, whisk into the brownie batter until combined and smooth.
- Use a rubber spatula to stir in all-purpose flour, unsweetened cocoa powder, and salt until just combined.
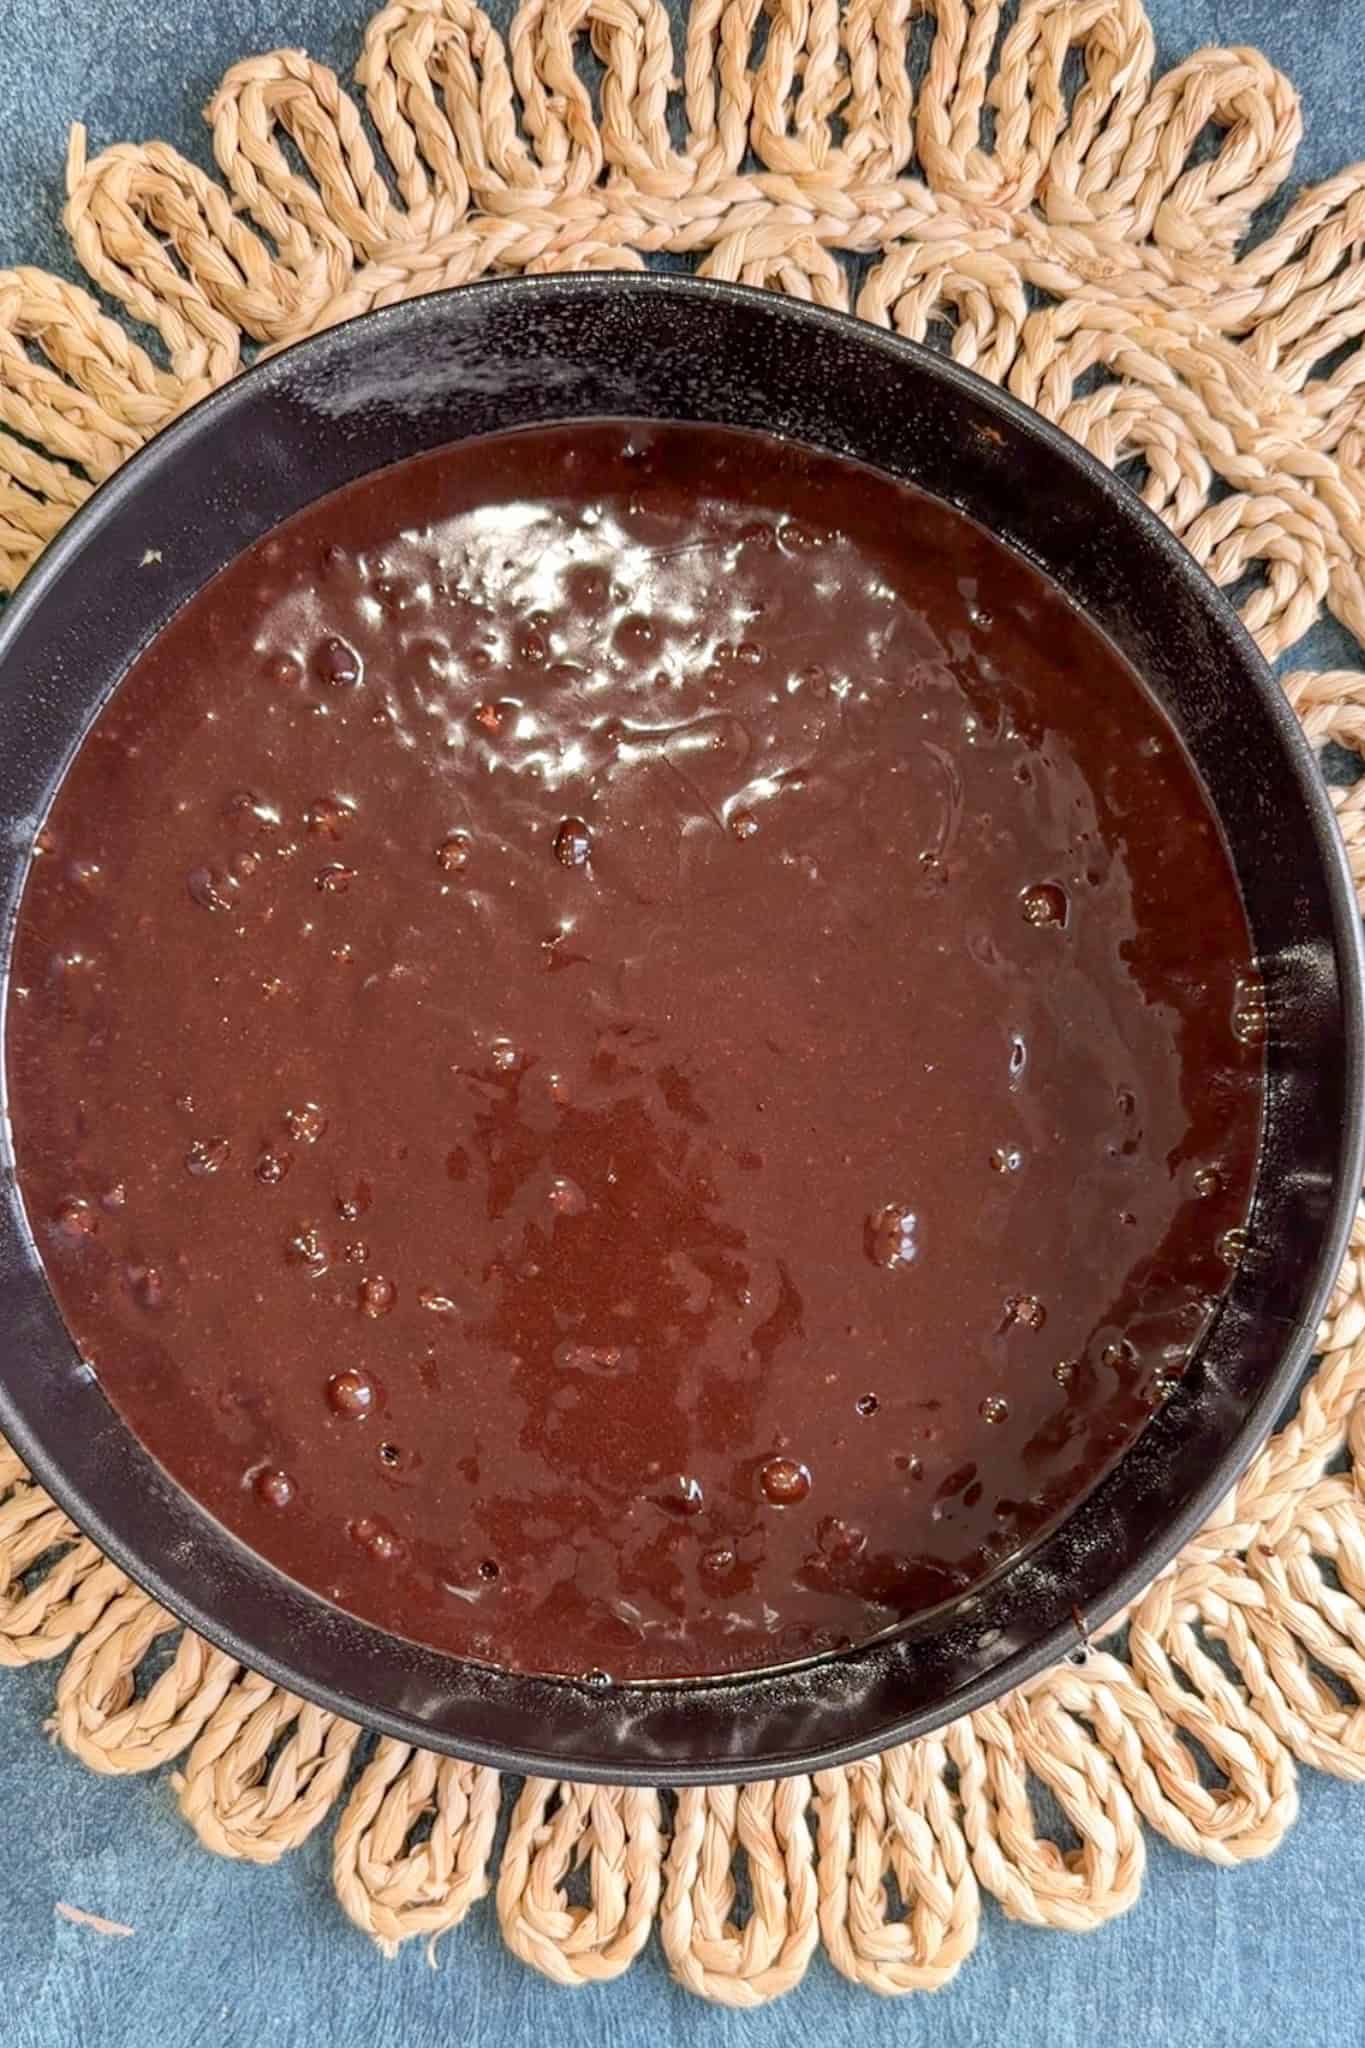
- Pour into prepared pan and smooth out.
- Bake in the preheated oven for 30 minutes. Let cool in pan 30 minutes.
Making the chocolate mousse
First we melt the chocolate
- Add the chopped chocolate to a heat safe bowl.
- Fill a saucepan with about ½ inch of water and place over medium heat. Then place the heat safe bowl on top, ensuring it does not touch the water.
- Once simmering, the water below will slowly melt the chocolate. Stir until smooth then remove from heat. Allow the chocolate to cool slightly while you clean out the saucepan as we will be using it again.
Add eggs to the melted chocolate
- After a few minutes, whisk 3 egg yolks into the chocolate mixture one at a time. The chocolate will thicken significantly, but that’s ok.
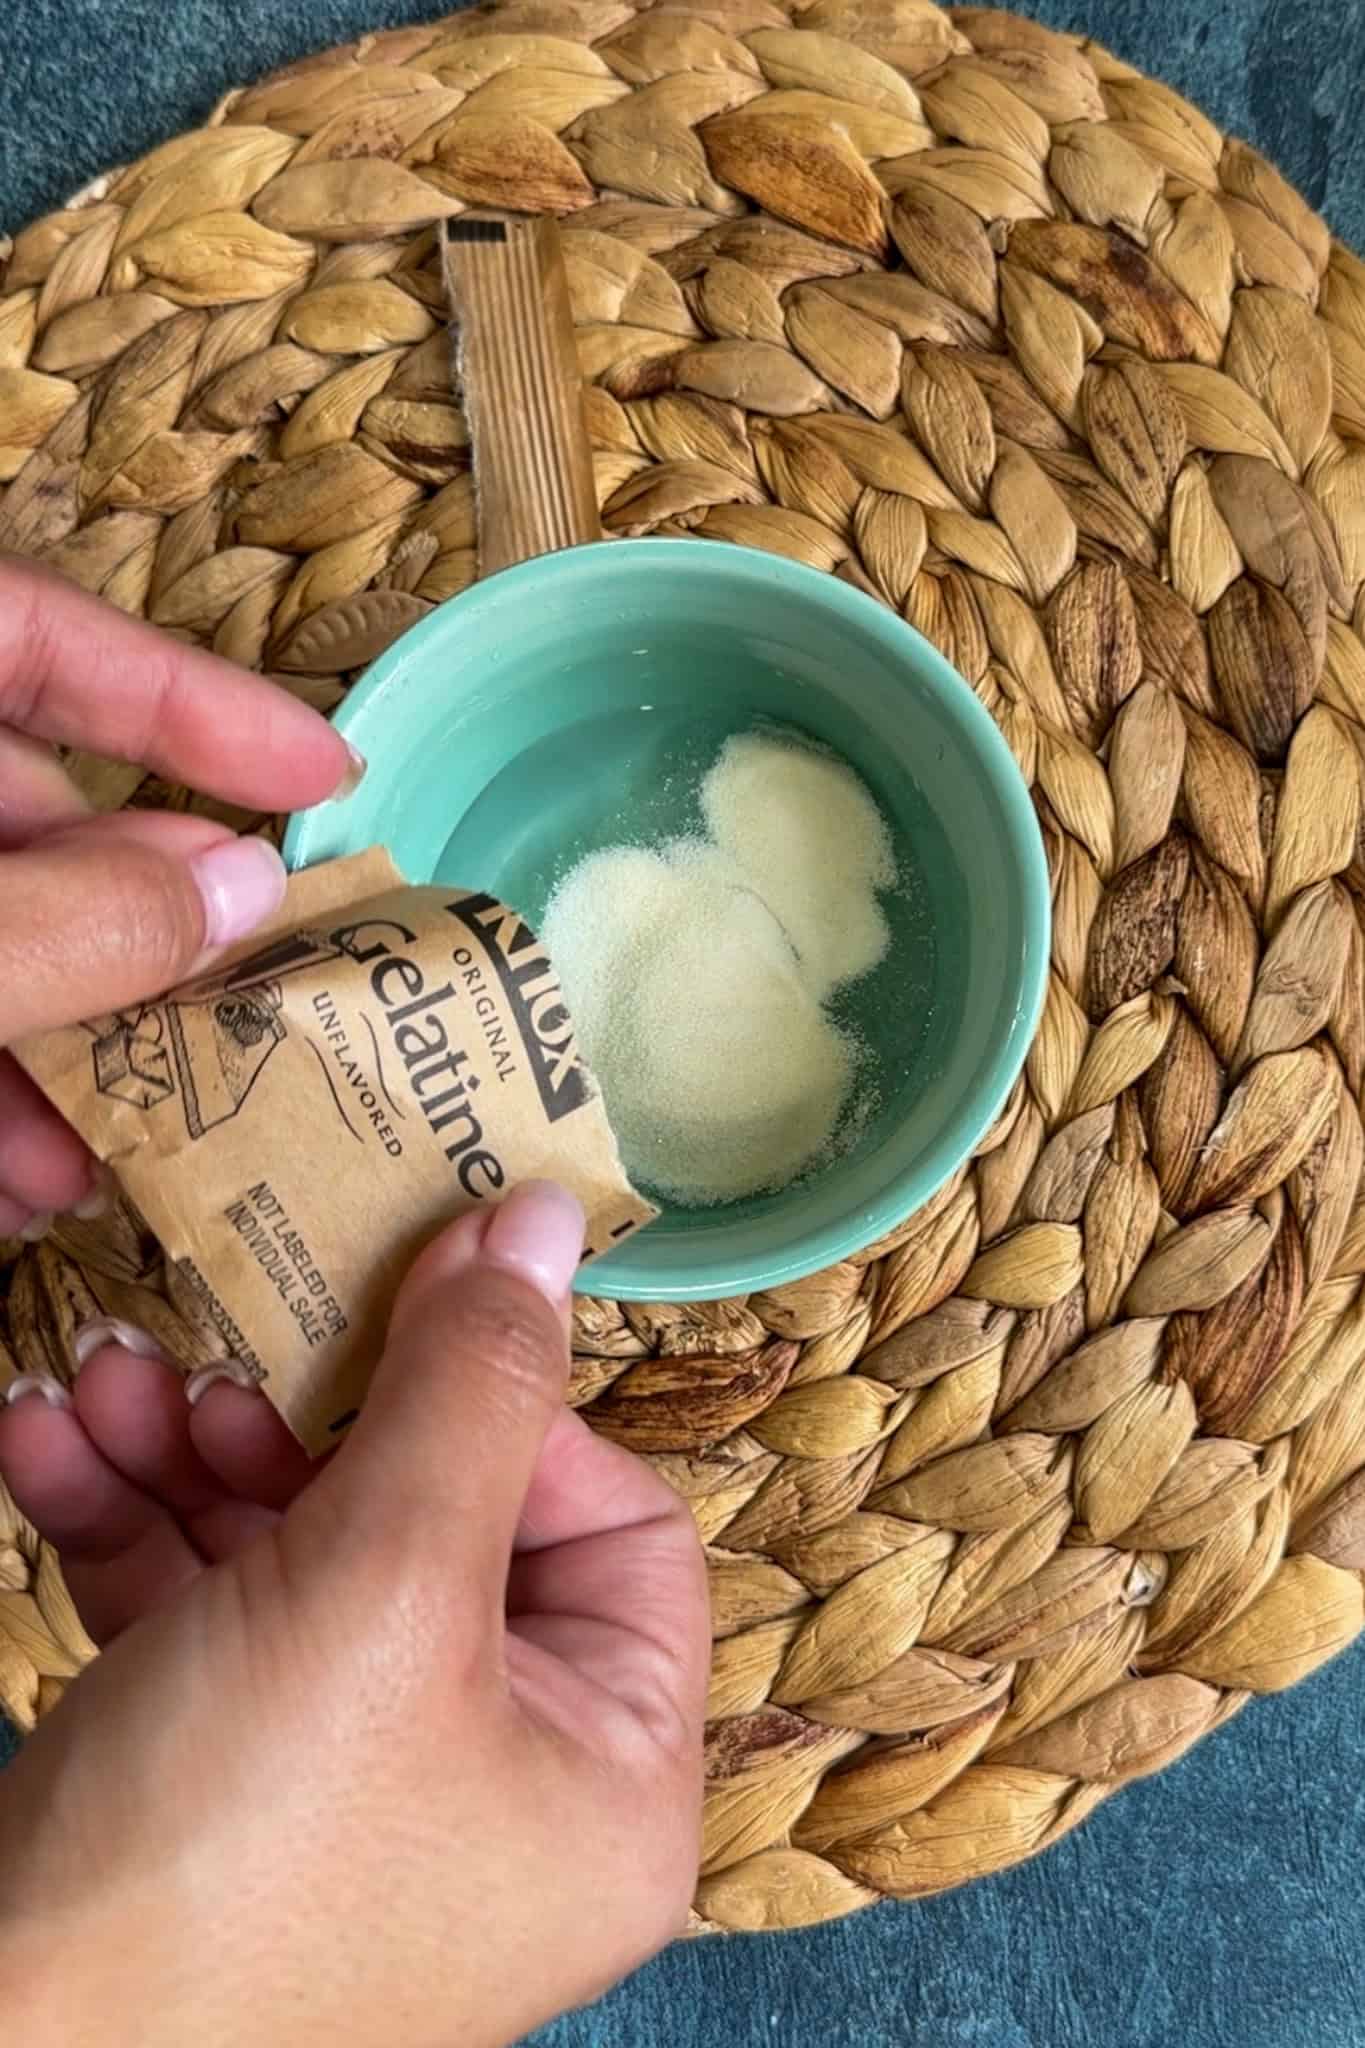
Bloom the gelatin
- Now fill a tiny bowl with 3 tablespoons of water and sprinkle the gelatin on top. Let it sit while we heat the cream.
Mix warm cream and gelatin
- Pour ¾ cup of heavy cream into a saucepan and place it over medium-low heat. Heat just until it’s steaming but not bubbling.
- By now, the gelatin should have bloomed. Scoop the gelatin into the steaming cream and whisk to melt.
Combine cream mixture and chocolate
- Remove from heat and pour half of the cream into the chocolate and egg yolk mixture. Whisk until smooth, then whisk in the rest of the hot cream, salt and coffee liqueur. The chocolate mixture should now be smooth and glossy – almost like pudding.
Make whipped cream
- Now in a large bowl using a mixer with the whisk attachment, add the remaining 1 cup of heavy cream. Whip on high speed until light and fluffy with stiff peaks.
- Scoop the heavy cream into a smaller bowl and clean out the big mixing bowl and whisk. Make sure both are spotless and completely dry.
Make the meringue
- In a clean bowl, make the meringue by adding the egg whites and cream of tartar. Whip on high speed. Once it starts to turns foamy and opaque, slowly whip in the fine sugar. Keep mixing on high speed until it turns white with soft peaks (pull the whisk away and if the meringue stands up with a little droop on the end, it’s perfect).
Combine everything to make the chocolate mousse
- Now we have our bowl of chocolate, a bowl of whipped cream, and a bowl of meringue.
- Using a rubber spatula, scoop the whipped cream into the chocolate mixture and gently fold to combine.
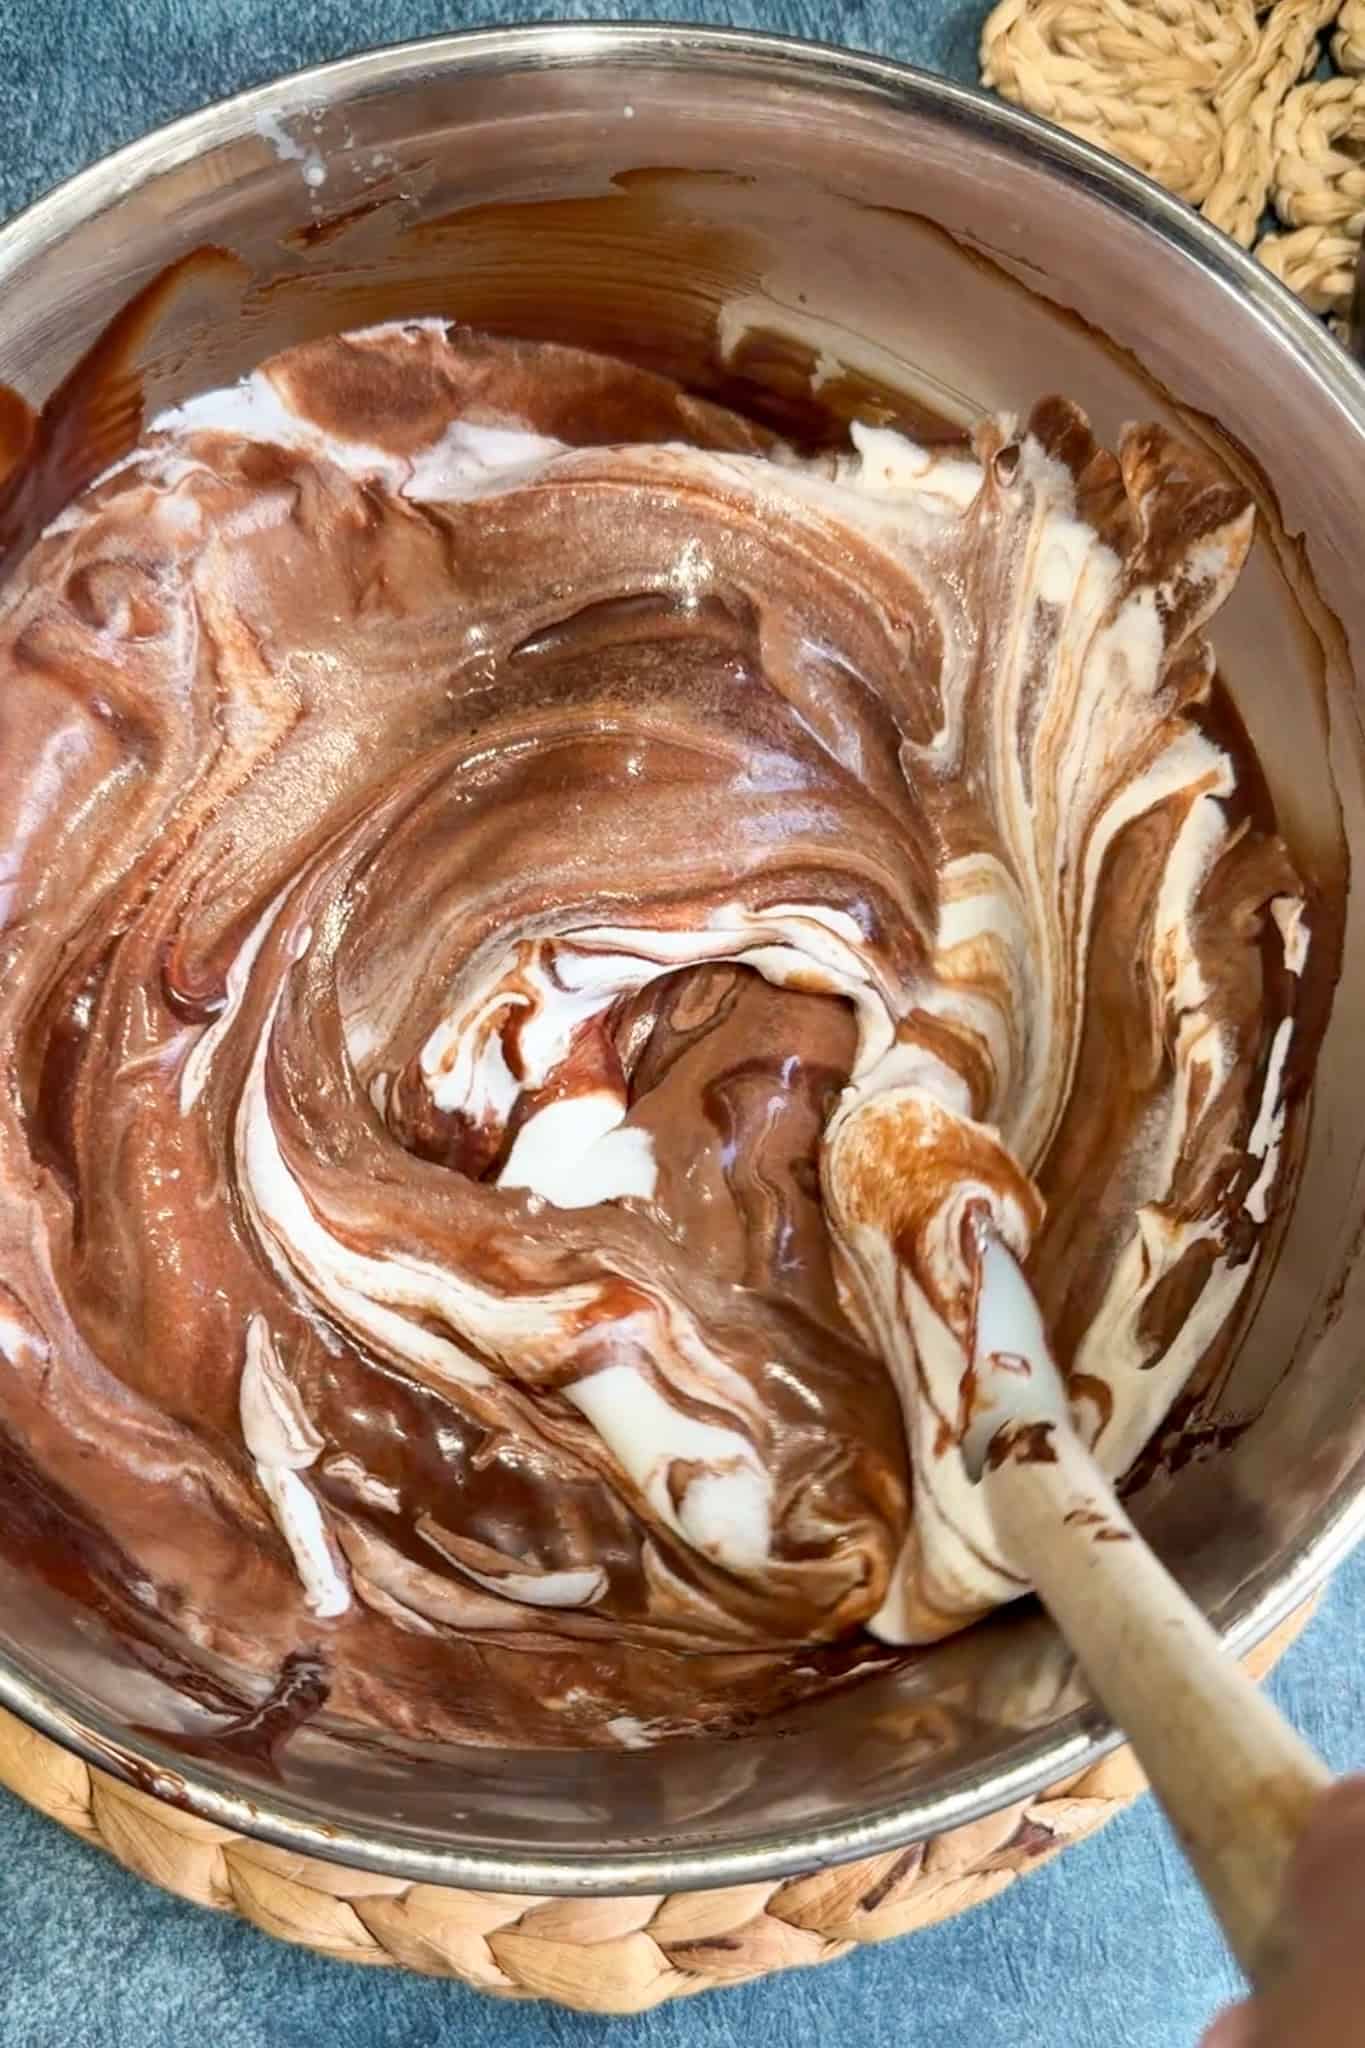
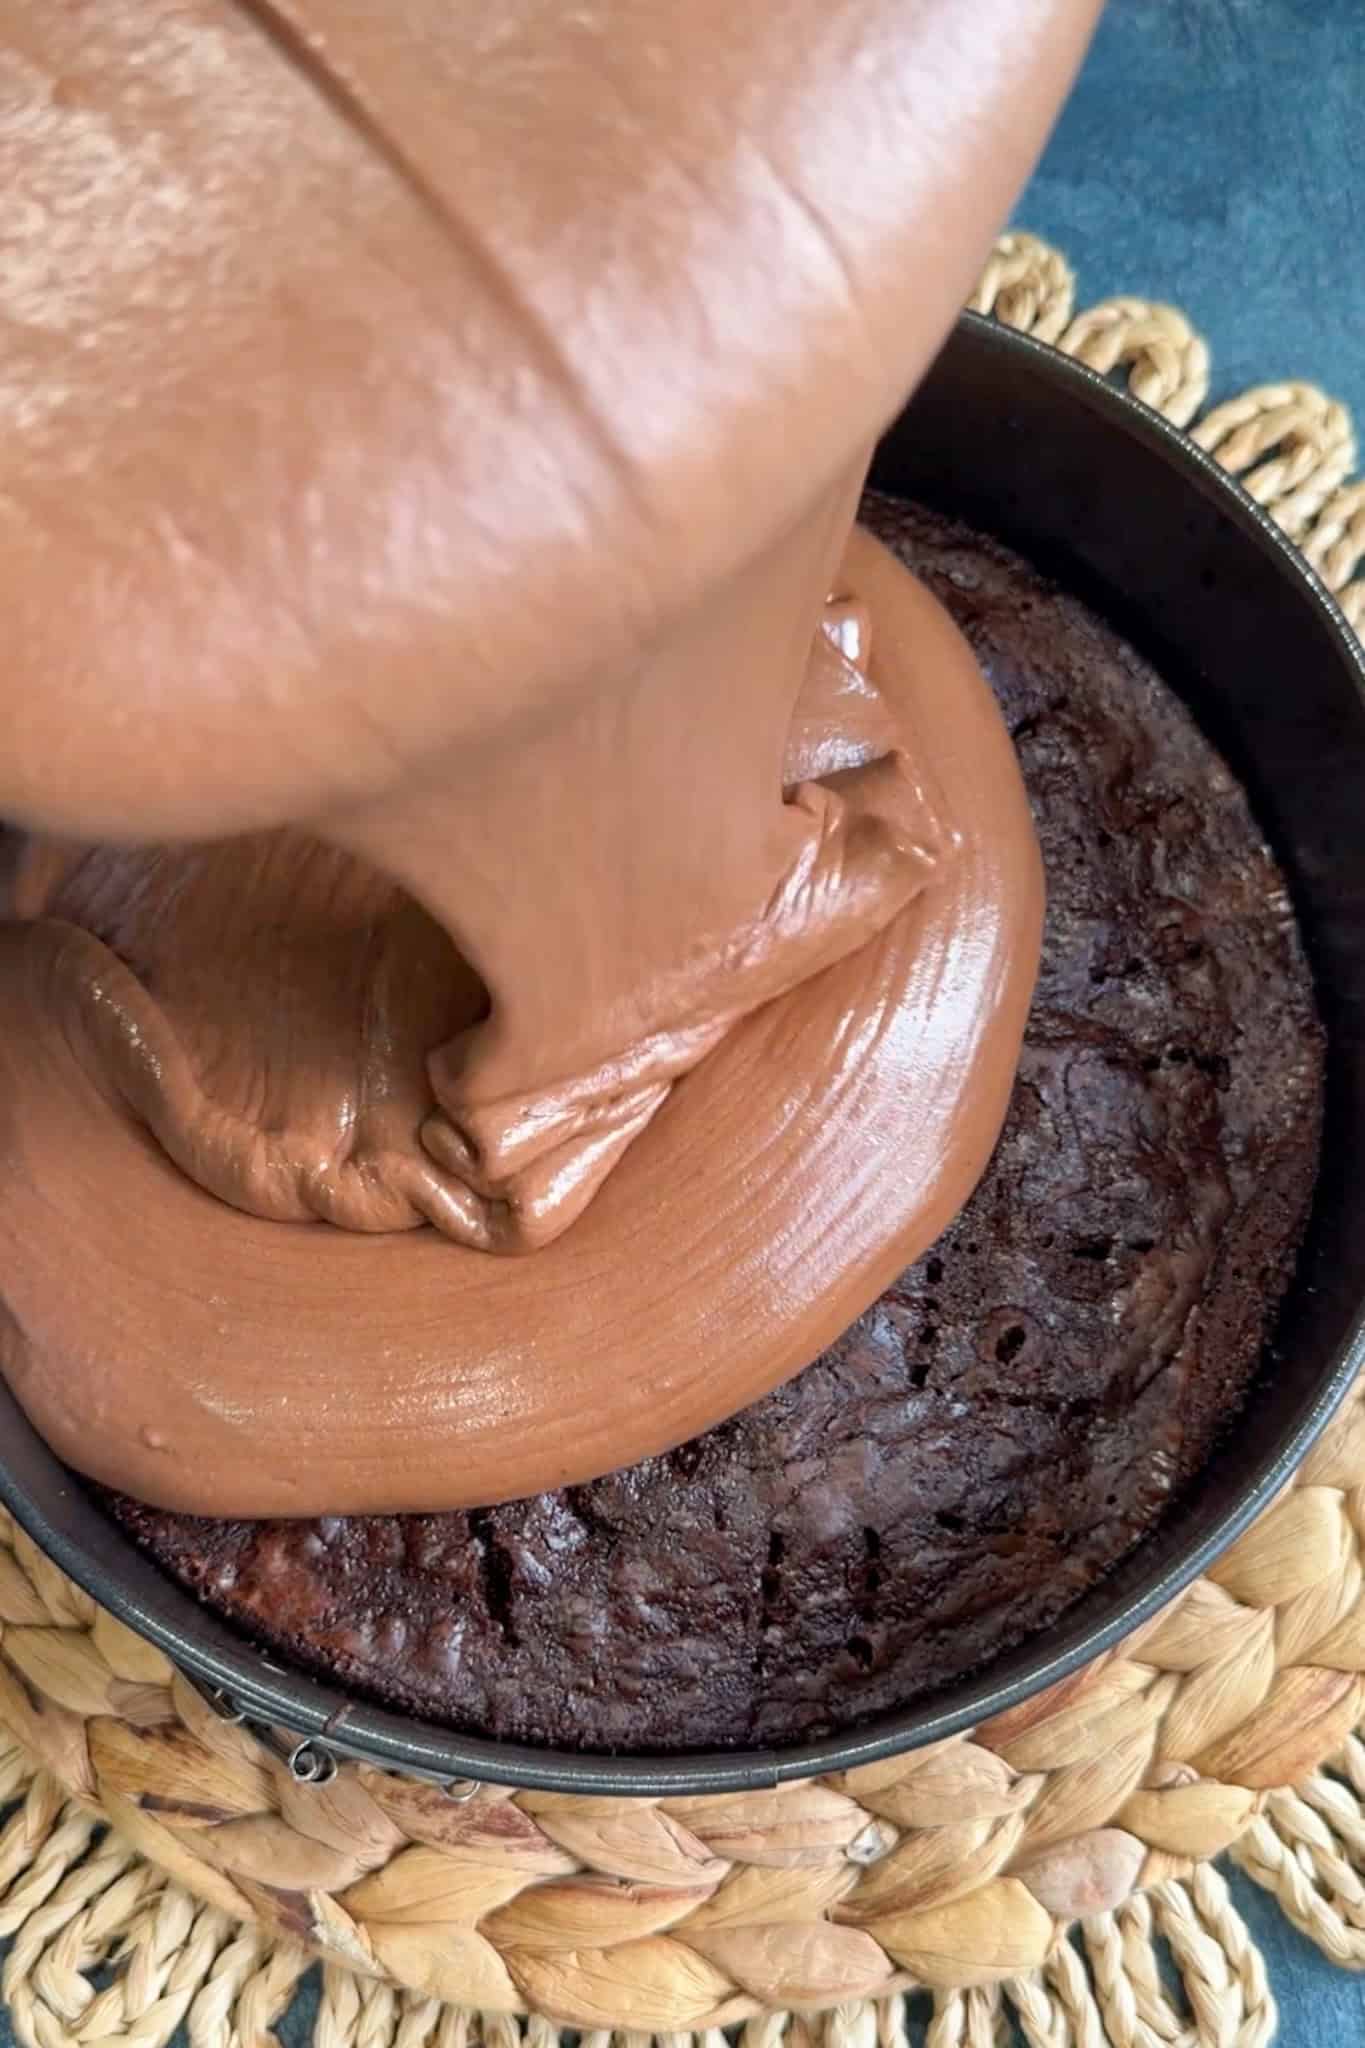
- When it’s well incorporated, scoop in the meringue and repeat the process. Keep folding until the mousse is all one color with zero white streaks. The mousse should also be somewhat thin and pourable.
- Pour the mousse over the brownie and chill in the refrigerator for at least 4 hours but preferably overnight.
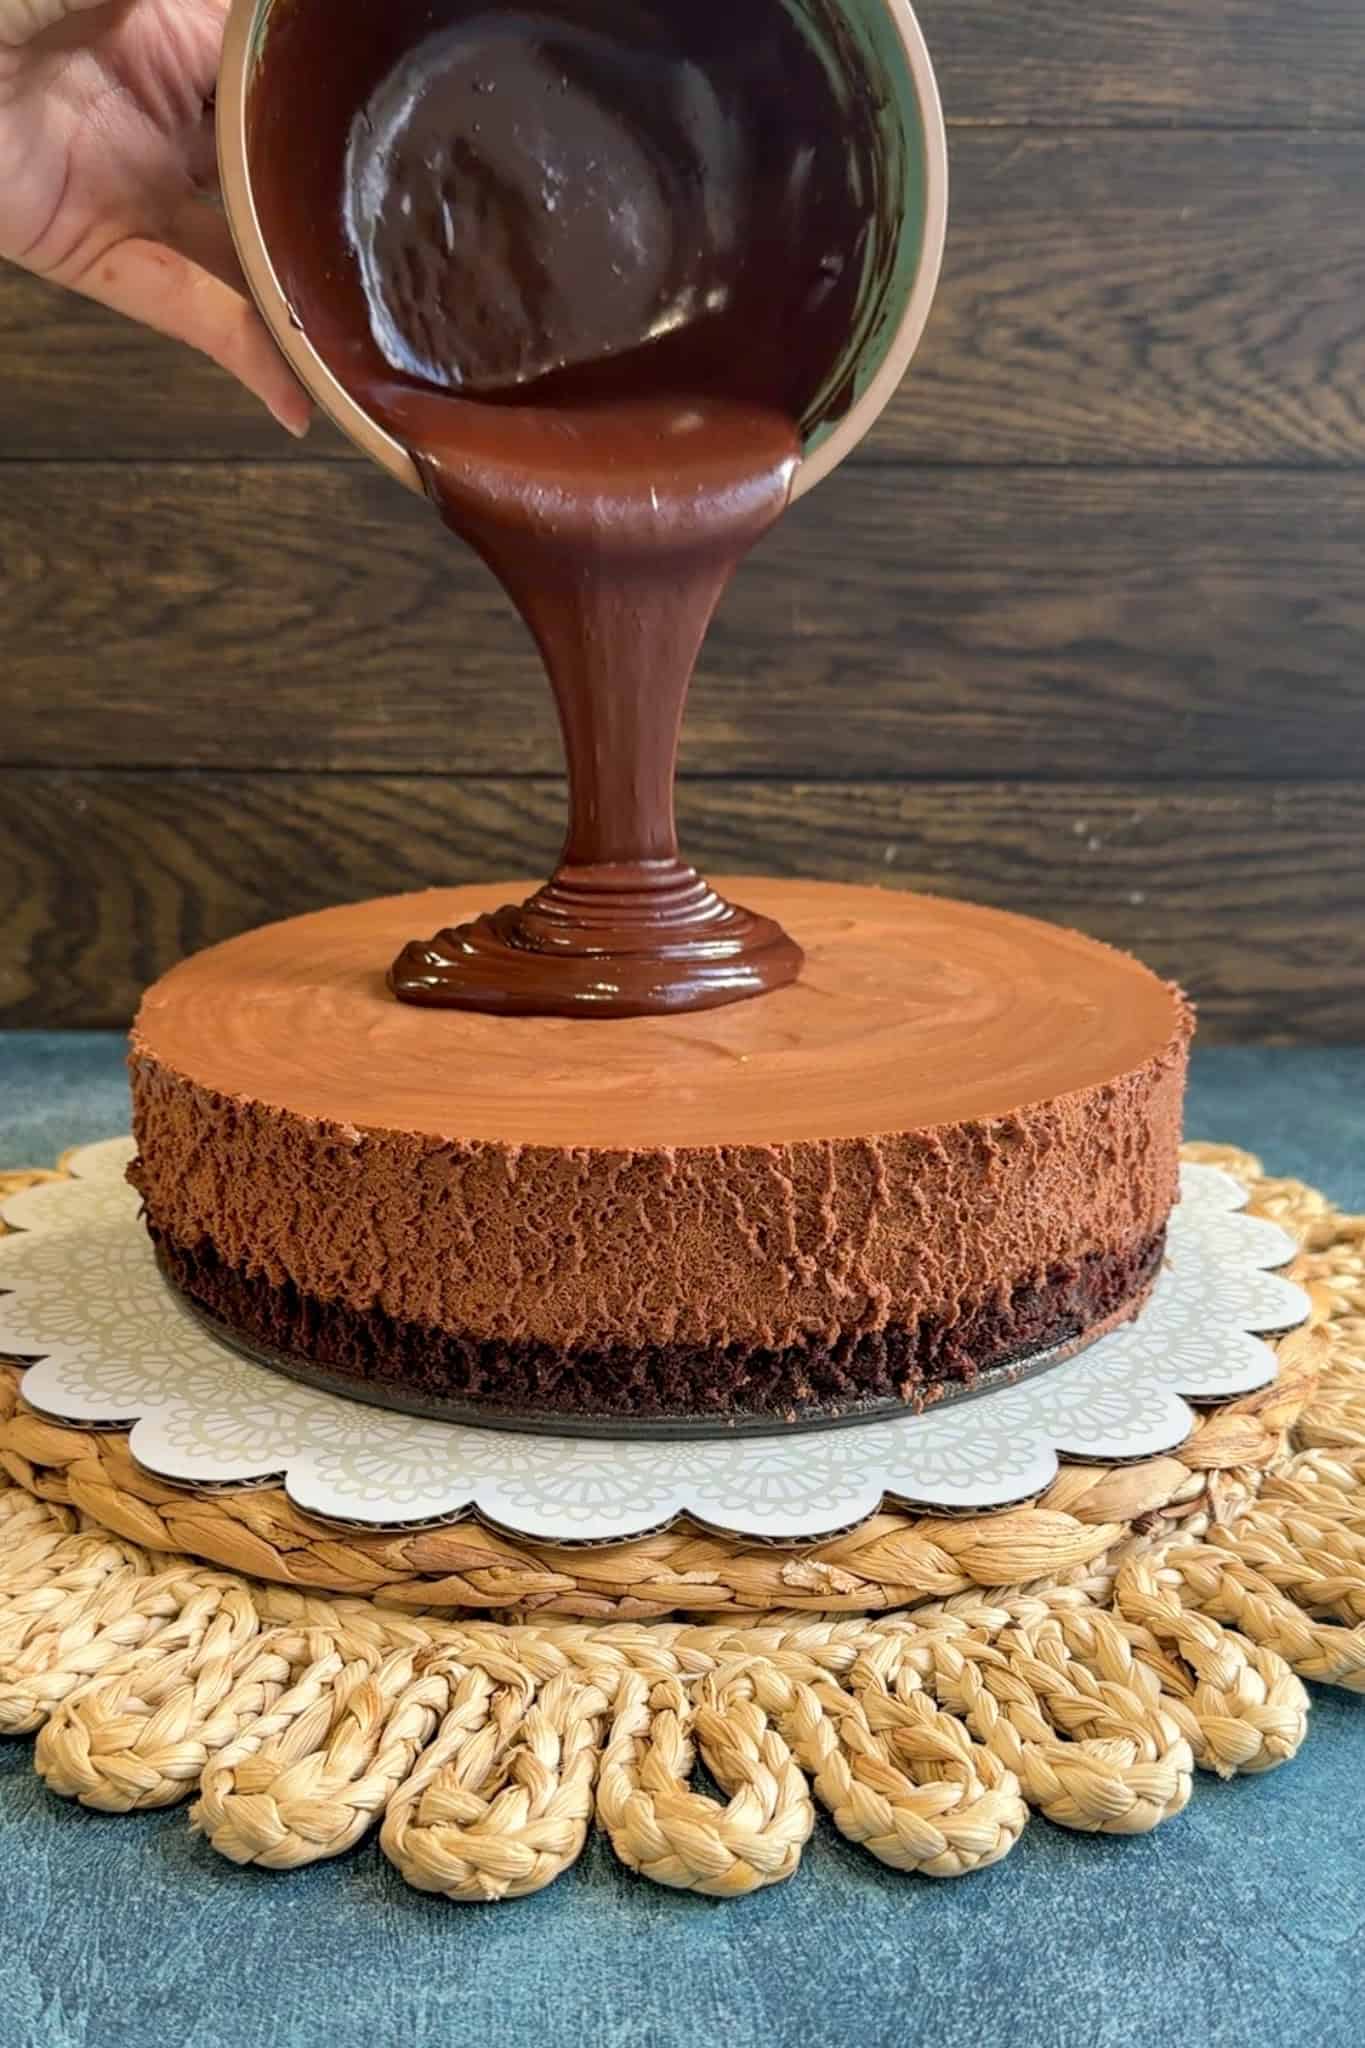
Make the chocolate ganache
- When the mousse has set, run a warm knife along the edge of the mousse cake to loosen it from the sides of the pan. This step ensures that the cheesecake is fully detached and makes it easier to release from the pan without any mishaps.Slowly and carefully open the latch, ensuring that the sides of the pan separate smoothly and evenly without causing any cracks or breakage in the mousse. Take your time to ensure a clean, flawless release without any damage to the cheesecake’s surface or edges.
- For the ganache, add the chopped chocolate to a medium-sized heat safe bowl and the heavy cream to a heat safe measuring glass.
- Microwave the cream until it’s hot and bubbling. Pour the hot cream over the chocolate, ensuring the chocolate is completely submerged.
- Allow the mixture to sit for about 3-5 minutes, then whisk to combine.
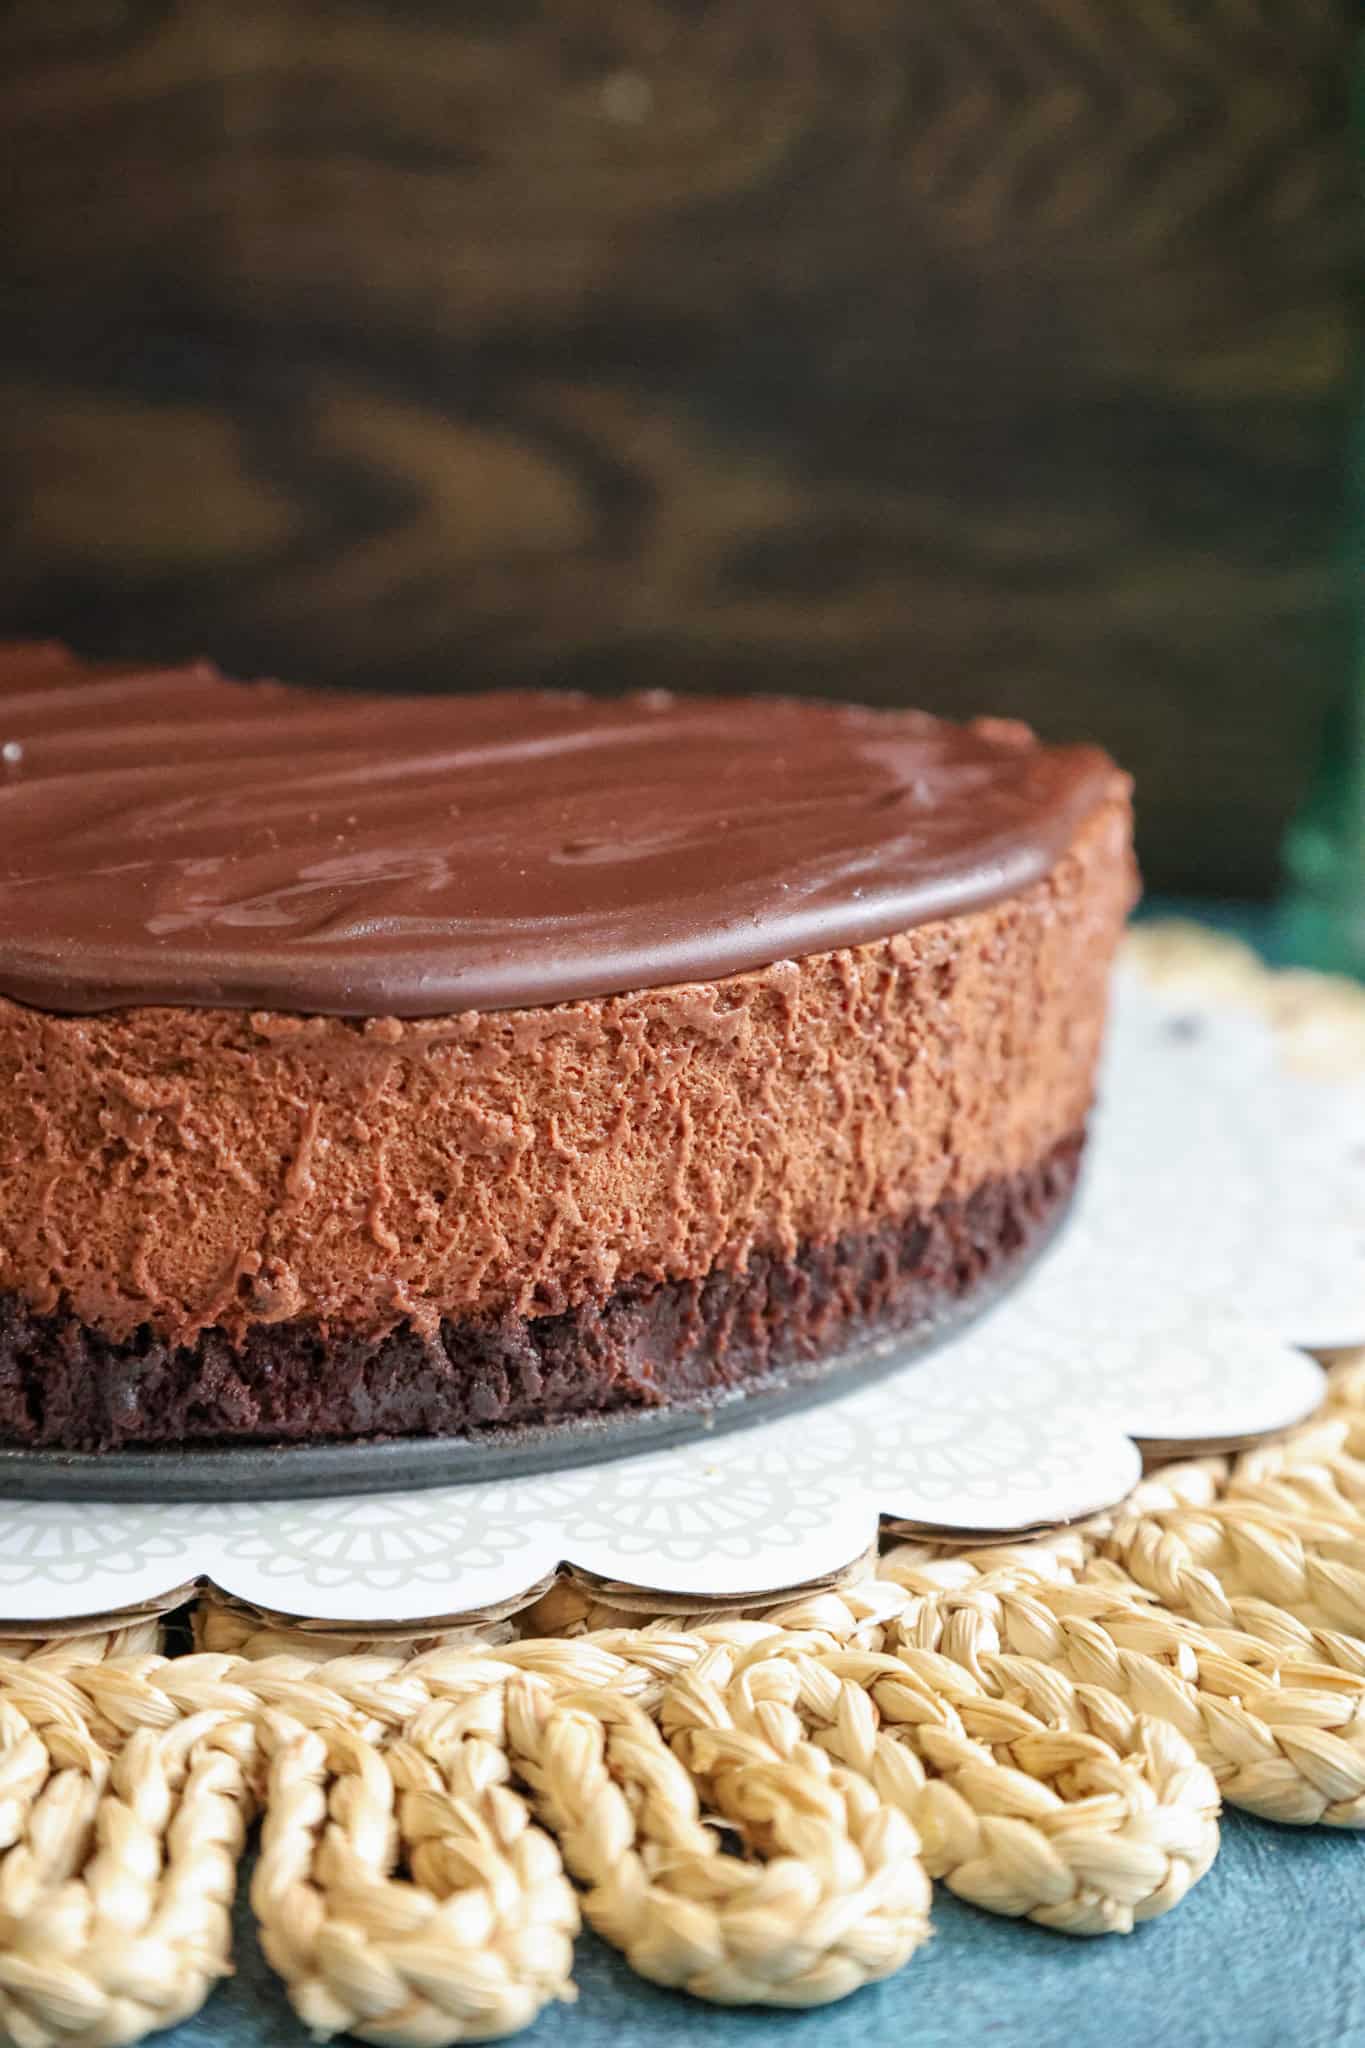
- Pour the glossy ganache in the center of the cake and use a spatula to spread it out towards the sides, allowing it to drip down.
- Chill the cake for at least 30 minutes to allow the ganache to set. Then slice and enjoy!
Variations and substitutions for this chocolate mousse cake
Brownie Base Variations
Swap the brownie base to
• Gluten-free brownie – almond flour or GF blend, no flavor loss
• Chocolate cake → lighter bite, better if mousse is very rich
• Blondie base – unexpected contrast, works with dark mousse
Flavor upgrades
• Spiced brownie – cinnamon, chili, or cayenne (use restraint)
• Nut brownie – hazelnut, pecan, or walnut for texture
Chocolate Mousse Variations
Chocolate type swaps
• White chocolate mousse – visually striking, very rich
• Ruby chocolate – niche, tart-berry notes
Flavor infusions (pick ONE, don’t stack)
• Orange zest or Grand Marnier
• Peppermint or spearmint
• Raspberry or passion fruit purée
• Chili or smoked paprika (micro-dose)
Mousse texture tweaks
• Egg-free mousse (ganache + whipped cream) – safer, faster
• Aquafaba mousse – vegan option that actually works
Dietary & Ingredient Substitutions
Dairy-free
• Coconut cream mousse
• Olive oil brownie (yes, it works)
• Vegan dark chocolate (high cocoa butter)
Lower sugar
• Use 72–85% chocolate
• Replace part of sugar with date paste or coconut sugar
• Skip sweet toppings
Top tips for making this chocolate mousse brownie cake
Use High-Quality Chocolate:
- Invest in good-quality chocolate (60-70% cacao for dark or premium semi-sweet) as it's the star ingredient and directly impacts the final flavor.
- Avoid chocolate chips as they contain stabilizers that prevent smooth melting – use bar chocolate chopped into small pieces instead.
Bloom Gelatin Properly:
- Always bloom gelatin in cold water first, letting it sit for 5 minutes until it becomes sponge-like before dissolving.
- Never add gelatin directly to hot liquid or boil it, as high heat can destroy its setting properties.
- Ensure the gelatin is completely dissolved and smooth before adding to the mousse mixture.
Temper Your Chocolate Mixture:
- Let melted chocolate cool to room temperature before folding into whipped cream to prevent the cream from deflating or the chocolate from seizing.
- If the chocolate is too hot, it will melt the whipped cream and create a runny mousse instead of a fluffy one.
Whip Cream to Soft Peaks Only:
- Stop whipping when cream forms soft peaks that gently fold over – over-whipped cream will make the mousse grainy and dense.
- Chill your bowl and beaters in the freezer for 10-15 minutes before whipping for best results.
Fold Gently, Don't Stir:
- Use a rubber spatula and fold the whipped cream into the chocolate mixture with gentle, sweeping motions from bottom to top.
- Aggressive stirring will deflate the cream and result in a dense mousse rather than a light, airy texture.
Cool the Brownie Base Completely:
- Let your brownie layer cool to room temperature before adding the mousse, or the heat will melt the mousse and prevent it from setting properly.
- For faster cooling, place the brownie in the refrigerator for 20-30 minutes.
Chill Adequately:
- Allow at least 4-6 hours (or preferably overnight) for the mousse to fully set in the refrigerator.
- Rushing this step will result in a mousse that's too soft to slice cleanly.
Line Your Pan for Easy Release:
- Use parchment paper or acetate strips around the sides of your springform pan for effortless removal and professional-looking edges.
- Grease the pan lightly before adding parchment to help it stick in place.
Use Room Temperature Ingredients:
- Bring eggs to room temperature before using (if your recipe calls for them) so they incorporate smoothly without shocking the chocolate.
- Cold ingredients can cause chocolate to seize or become grainy.
Slice with a Hot Knife:
- Dip your knife in hot water, wipe it dry, and then slice through the cake for clean, professional cuts.
- Wipe and reheat the knife between each slice for the best presentation.
Don't Skip the Resting Time:
- Let the cake sit at room temperature for 5-10 minutes before serving to allow the chocolate flavor to fully bloom.
- Mousse cake tastes best when it's cold but not ice-cold straight from the fridge.
Taste and Adjust Sweetness:
- Taste your chocolate mixture before adding the whipped cream and adjust sugar if needed, especially if using very dark chocolate.
- Remember that chilling dulls sweetness slightly, so the mousse should taste just slightly sweeter than your desired final result.
Storage Instructions for this chocolate brownie mousse cake
Refrigerator Storage (Recommended):
- Store the chocolate mousse cake in an airtight container or cover tightly with plastic wrap to prevent it from absorbing odors from other foods in the refrigerator.
- The cake will keep fresh in the refrigerator for up to 3-5 days.
- For best results, let the cake sit at room temperature for 5-10 minutes before serving to allow the chocolate flavors to fully develop and the texture to soften slightly.
- If the cake is already sliced, place parchment paper between slices to prevent them from sticking together.
Freezer Storage:
- Chocolate mousse cake can be frozen for up to 1-2 months, though the texture may change slightly upon thawing.
- Wrap individual slices or the whole cake tightly in plastic wrap, then cover with aluminum foil or place in a freezer-safe container to prevent freezer burn.
- To thaw, transfer the cake to the refrigerator and let it defrost overnight (6-8 hours). Never thaw at room temperature as this can cause the mousse to become watery.
- For best texture and flavor, consume frozen mousse cake within 1 month.
Important Notes:
- Never leave chocolate mousse cake at room temperature for more than 2 hours, as it contains dairy and eggs that can spoil.
- The mousse layer needs to stay cold to maintain its structure – if it gets too warm, it will become soft and lose its shape.
- Always use a clean knife when cutting slices to prevent contamination, and wipe the knife between cuts for cleaner slices.
Serving Tip: For the most elegant presentation, garnish the cake just before serving rather than storing it with toppings, as whipped cream, fresh fruit, or chocolate shavings may wilt or become soggy during storage.
Check out these other dessert recipes


More recipes to try
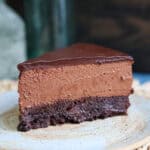
Chocolate Mousse Cake
Ingredients
Brownies
- 10 tablespoons salted butter melted
- 1 cup granulated sugar
- 2 large eggs
- 1 teaspoon vanilla extract
- 1 tablespoon Kahlua or coffee liqueur
- ½ cup dark chocolate chips melted
- ¾ cup all-purpose flour
- ¼ cup unsweetened cocoa powder
- ¼ teaspoon salt
- ½ cup chocolate chips
Brownie Soak
- ⅓ cup brewed espresso coffee
- 2 tablespoon of Kahlua or coffee liqueur
- 1 tablespoon dutch process cocoa powder
Chocolate Mousse
- 8 oz 70% dark chocolate chopped
- 6 oz milk chocolate chopped
- 3 large eggs separated
- 3 tablespoon water
- 1 ½ teaspoon unflavored gelatin
- 1 ¾ cup heavy cream divided
- ½ teaspoon cream of tartar
- ½ teaspoon salt
- ¼ cup powdered sugar
Chocolate Ganache
- 6 oz 70% dark chocolate chopped
- ¾ cup heavy cream
Instructions
Brownie
- Preheat the oven to 350°F and grease a 10 inch round springform cheesecake pan.
- Melt 10 tablespoons salted butter in the microwave in a micrwoave-safe bowl in 20-second increments until fully melted. Pour into a large mixing bowl. Whisk in granulated sugar by hand until smooth, 30 seconds.
- Add in the eggs, vanilla extract and coffee liqueur. Whisk vigorously for 1 minute to ensure a crackly top.
- Melt ½ cup chocolate chips in a microwave in 30-second increments, stirring between each. Once melted and smooth, whisk into the brownie batter until combined and smooth.
- Use a rubber spatula to stir in all-purpose flour, unsweetened cocoa powder, and salt until just combined.
- Pour into prepared pan and smooth out.
- Bake in the preheated oven for 30 minutes. Let cool in pan 30 minutes.
Chocolate Cake Soak
- Stir together the hot coffee, coffee liqueur and cocoa powder.
- Spoon the mixture over the brownie, evenly soaking the entire surface.
- Now set the brownie base aside while we make the mousse.
Chocolate Mousse
- Add the chopped chocolate to a heat safe bowl.
- Fill a saucepan with about ½ inch of water and place over medium heat. Then place the heat safe bowl on top, ensuring it does not touch the water.
- Once simmering, the water below will slowly melt the chocolate. Stir until smooth then remove from heat. Allow the chocolate to cool slightly while you clean out the saucepan as we will be using it again.
- After a few minutes, whisk 3 egg yolks into the chocolate mixture one at a time. The chocolate will thicken significantly, but that’s ok.
- Now fill a tiny bowl with 3 tablespoons of water and sprinkle the gelatin on top. Let it sit while we heat the cream.
- Pour ¾ cup of heavy cream into the cleaned saucepan and place it over medium-low heat. Heat just until it’s steaming but not bubbling.
- By now, the gelatin should have bloomed. Scoop the gelatin into the steaming cream and whisk to melt.
- Remove from heat and pour half of the cream into the chocolate and egg yolk mixture. Whisk until smooth, then whisk in the rest of the hot cream, salt and coffee liqueur. The chocolate mixture should now be smooth and glossy – almost like pudding.
- Now in a large bowl using a mixer with the whisk attachment, add the remaining 1 cup of heavy cream. Whip on high speed until light and fluffy with stiff peaks.
- Scoop the heavy cream into a smaller bowl and clean out the big mixing bowl and whisk. Make sure both are spotless and completely dry.
- In a clean bowl, make the meringue by adding the egg whites and cream of tartar. Whip on high speed. Once it starts to turns foamy and opaque, slowly whip in the powdered sugar. Keep mixing on high speed until it turns white with soft peaks (pull the whisk away and if the meringue stands up with a little droop on the end, it’s perfect).
- Now we have our bowl of chocolate, a bowl of whipped cream, and a bowl of meringue.
- Using a rubber spatula, scoop the whipped cream into the chocolate mixture and gently fold to combine.
- When it’s well incorporated, scoop in the meringue and repeat the process. Keep folding until the mousse is all one color with zero white streaks. The mousse should also be somewhat thin and pourable.
- Pour the mousse over the brownie and chill in the refrigerator for at least 4 hours but preferably overnight.
Chocolate Ganache
- When the mousse has set, run a warm knife along the edge of the mousse cake to loosen it from the sides of the pan. This step ensures that the cheesecake is fully detached and makes it easier to release from the pan without any mishaps.Slowly and carefully open the latch, ensuring that the sides of the pan separate smoothly and evenly without causing any cracks or breakage in the mousse. Take your time to ensure a clean, flawless release without any damage to the cheesecake’s surface or edges.
- For the ganache, add the chopped chocolate to a medium-sized heat safe bowl and the heavy cream to a heat safe measuring glass.
- Microwave the cream until it’s hot and bubbling. Pour the hot cream over the chocolate, ensuring the chocolate is completely submerged.
- Allow the mixture to sit for about 3-5 minutes, then whisk to combine.
- Pour the glossy ganache in the center of the cake and use a spatula to spread it out towards the sides, allowing it to drip down.
- Chill the cake for at least 30 minutes to allow the ganache to set. Then slice and enjoy!
Notes
Top tips for making this chocolate mousse brownie cake
Use High-Quality Chocolate:- Invest in good-quality chocolate (60-70% cacao for dark or premium semi-sweet) as it's the star ingredient and directly impacts the final flavor.
- Avoid chocolate chips as they contain stabilizers that prevent smooth melting – use bar chocolate chopped into small pieces instead.
- Always bloom gelatin in cold water first, letting it sit for 5 minutes until it becomes sponge-like before dissolving.
- Never add gelatin directly to hot liquid or boil it, as high heat can destroy its setting properties.
- Ensure the gelatin is completely dissolved and smooth before adding to the mousse mixture.
- Let melted chocolate cool to room temperature before folding into whipped cream to prevent the cream from deflating or the chocolate from seizing.
- If the chocolate is too hot, it will melt the whipped cream and create a runny mousse instead of a fluffy one.
- Stop whipping when cream forms soft peaks that gently fold over – over-whipped cream will make the mousse grainy and dense.
- Chill your bowl and beaters in the freezer for 10-15 minutes before whipping for best results.
- Use a rubber spatula and fold the whipped cream into the chocolate mixture with gentle, sweeping motions from bottom to top.
- Aggressive stirring will deflate the cream and result in a dense mousse rather than a light, airy texture.
- Let your brownie layer cool to room temperature before adding the mousse, or the heat will melt the mousse and prevent it from setting properly.
- For faster cooling, place the brownie in the refrigerator for 20-30 minutes.
- Allow at least 4-6 hours (or preferably overnight) for the mousse to fully set in the refrigerator.
- Rushing this step will result in a mousse that's too soft to slice cleanly.
- Use parchment paper or acetate strips around the sides of your springform pan for effortless removal and professional-looking edges.
- Grease the pan lightly before adding parchment to help it stick in place.
- Bring eggs to room temperature before using (if your recipe calls for them) so they incorporate smoothly without shocking the chocolate.
- Cold ingredients can cause chocolate to seize or become grainy.
- Dip your knife in hot water, wipe it dry, and then slice through the cake for clean, professional cuts.
- Wipe and reheat the knife between each slice for the best presentation.
- Let the cake sit at room temperature for 5-10 minutes before serving to allow the chocolate flavor to fully bloom.
- Mousse cake tastes best when it's cold but not ice-cold straight from the fridge.
- Taste your chocolate mixture before adding the whipped cream and adjust sugar if needed, especially if using very dark chocolate.
- Remember that chilling dulls sweetness slightly, so the mousse should taste just slightly sweeter than your desired final result.
Storage Instructions for this chocolate brownie mousse cake
Refrigerator Storage (Recommended):- Store the chocolate mousse cake in an airtight container or cover tightly with plastic wrap to prevent it from absorbing odors from other foods in the refrigerator.
- The cake will keep fresh in the refrigerator for up to 3-5 days.
- For best results, let the cake sit at room temperature for 5-10 minutes before serving to allow the chocolate flavors to fully develop and the texture to soften slightly.
- If the cake is already sliced, place parchment paper between slices to prevent them from sticking together.
- Chocolate mousse cake can be frozen for up to 1-2 months, though the texture may change slightly upon thawing.
- Wrap individual slices or the whole cake tightly in plastic wrap, then cover with aluminum foil or place in a freezer-safe container to prevent freezer burn.
- To thaw, transfer the cake to the refrigerator and let it defrost overnight (6-8 hours). Never thaw at room temperature as this can cause the mousse to become watery.
- For best texture and flavor, consume frozen mousse cake within 1 month.
- Never leave chocolate mousse cake at room temperature for more than 2 hours, as it contains dairy and eggs that can spoil.
- The mousse layer needs to stay cold to maintain its structure – if it gets too warm, it will become soft and lose its shape.
- Always use a clean knife when cutting slices to prevent contamination, and wipe the knife between cuts for cleaner slices.
Mary says
This was so amazing! Family loved it